
I am always running across great ideas and things that I'd love to make or have for our childcare. My list of outdoor classroom ideas is far too long to share with you in a blog post, but I thought I would share a few things that I saw at the Great Lakes Science Center and Museum of Natural History in Cleveland, Ohio when I was there at the end of last month.
 First, I love this idea of a vertical gear board. We have a horizontal one, but I love the possibilities that come with a vertical one! Can you imagine, not just the gear work, but the HUGE vertical geoboard possibilities with this one? I don't know if we will make one this big, but we will definitely be getting one of these in the near future!

 Look at this great fabric frame! It was in the polymer playhouse. Shiny, knit stretchy material to push your face and hands into.... watch it stretch and take the form of the object you push up against it! Again, so simple, and SO much fun!
 You all know that I am wild about bubbles! Look at this giant bubble blowing machine and solution trough!
 You pull up on the string to raise the pipe and make a huge bubble film!
 You can investigate the bubble colors and patterns as the light hits it....


And you can blow seriously HUGE bubbles!

This one is a little bit far fetched, but one can wish, right? This photo luminescence station freezes your shadow against the wall! I think we tried this at least a couple of hundred times, and probably would have spent even more time playing there IF we had more time before they closed!

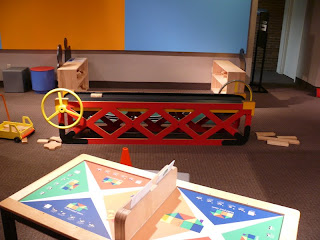
This one was at the Museum of Natural History. I love the manually operated conveyer belt for the block area. This was a busy station with children moving the blocks back and forth.

Check out this pulley station with a bucket on each end!

We already have a pvc pipe building set. We will definitely have too look into adding a few interlocking wooden panels for additional play and extensions with our current set.
I have absolutely no affiliation with either of these places, we just stopped to visit them during our vacation! If you are ever in or around the Cleveland area, I highly recommend visiting both of them as they are amazing for children of all ages!
Comments