I know I've posted our play dough recipe before, (you can find it in this post from 2010).
With all of the recent requests for the recipe and the fact that we play with play dough often,
I thought I would share it with you again.
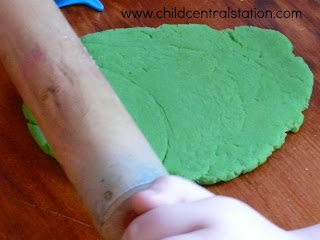
Today we made green play dough- a double batch. Here is the original single batch recipe:
1 c. flour
1/2 c. salt1 c. water
1 Tbsp cooking oil
2 tsp cream of tartar
1-2 pkg Kool-Aid and/or drops of food coloring
Mix all ingredients in a microwave save cooking dish.
Cook on high in microwave for 3 minutes
Remove from microwave, stir well.
Cook for one minute, stir, repeat until the dough is no longer sticky.
Remove from the dish- knead and remove any lumps.
This dough can also be cooked on the stove-top. We prefer to make it in the microwave as it is much more difficult to burn and the children are more active participants in the process.
**please note, we have a new microwave and this original recipe cooks the dough for too long. Cooking times will vary based upon your microwave. I recommend cooking it for one minute at a time, stirring after each minute. Today our dough only took 2 1/2 minutes to cook.**
Play dough is amazing for so many things! We have all kinds of tools available, but most of the time, I just plop the dough on the table. Most of the tools are well with in the children's reach, and rather than dictate how the dough will be used, I like to see the children ask for what they need and/or be independent about choosing materials.
After we completed our plan to make play dough and to make it green,
each child had the opportunity to come up with their own plan of action for playing with it.
Today, each child decided that they needed something different.
One wanted to roll the dough out - so they found a rolling pin.
One wanted to cut the dough, so they asked for a knife.
One wanted to "snip" the dough- and found a pair of scissors.
One just wanted to squish and squeeze the dough, so they chose no additional tools.
One child wanted to squish the dough through a machine to make "long squares of dough."
In the end, after their own explorations,
most of the children decide to try something else that they observed the other children doing.
One child even decided to "taste" the dough. The wonderful thing about making your own dough- you know what is in it, and even if the children do try to eat it, you know that it is safe.
Here are my responses to some of the most frequently asked questions in regard to our play dough:
1) How do you keep it fresh? I usually store our dough in a plastic zipper bag.
2) How long do you keep the dough? Honestly, I don't tend to keep it around very long. Typically a week. Young children- especially this time of year have lots of "germs" and even though the dough would last a lot longer in an air tight container when not in use, I get rid of it after a short period of time. During cough, cold, and flu season, I might even get rid of it faster. The materials to make fresh dough are very inexpensive, the children love to help make it- and it does not take much time. Thus, replacing it is not an issue.
3) How does it compare to store bought dough? I never really liked the store bought dough (at least I don't remember liking it). I like the opportunity to add our own color and to use things like Kool-Aid for a scent. I find our dough to be quite soft and pliable. Perfect for sculpting!
Do you have a favorite play dough recipe or thing to do with play dough?
I'd love to hear about it!


Comments