

Earlier this week, you were introduced to our Foamy Bubbles Water Table.
This table is great for your infants and toddlers, but it also
tends to be a great place for exploration for older children as well.

While pushing down on the foam to make bubbles,
it was discovered that the wet sponge/foam preserves your hand print!
This lead to an intensive investigation-
If pushing your hand down in the foam leaves a print....
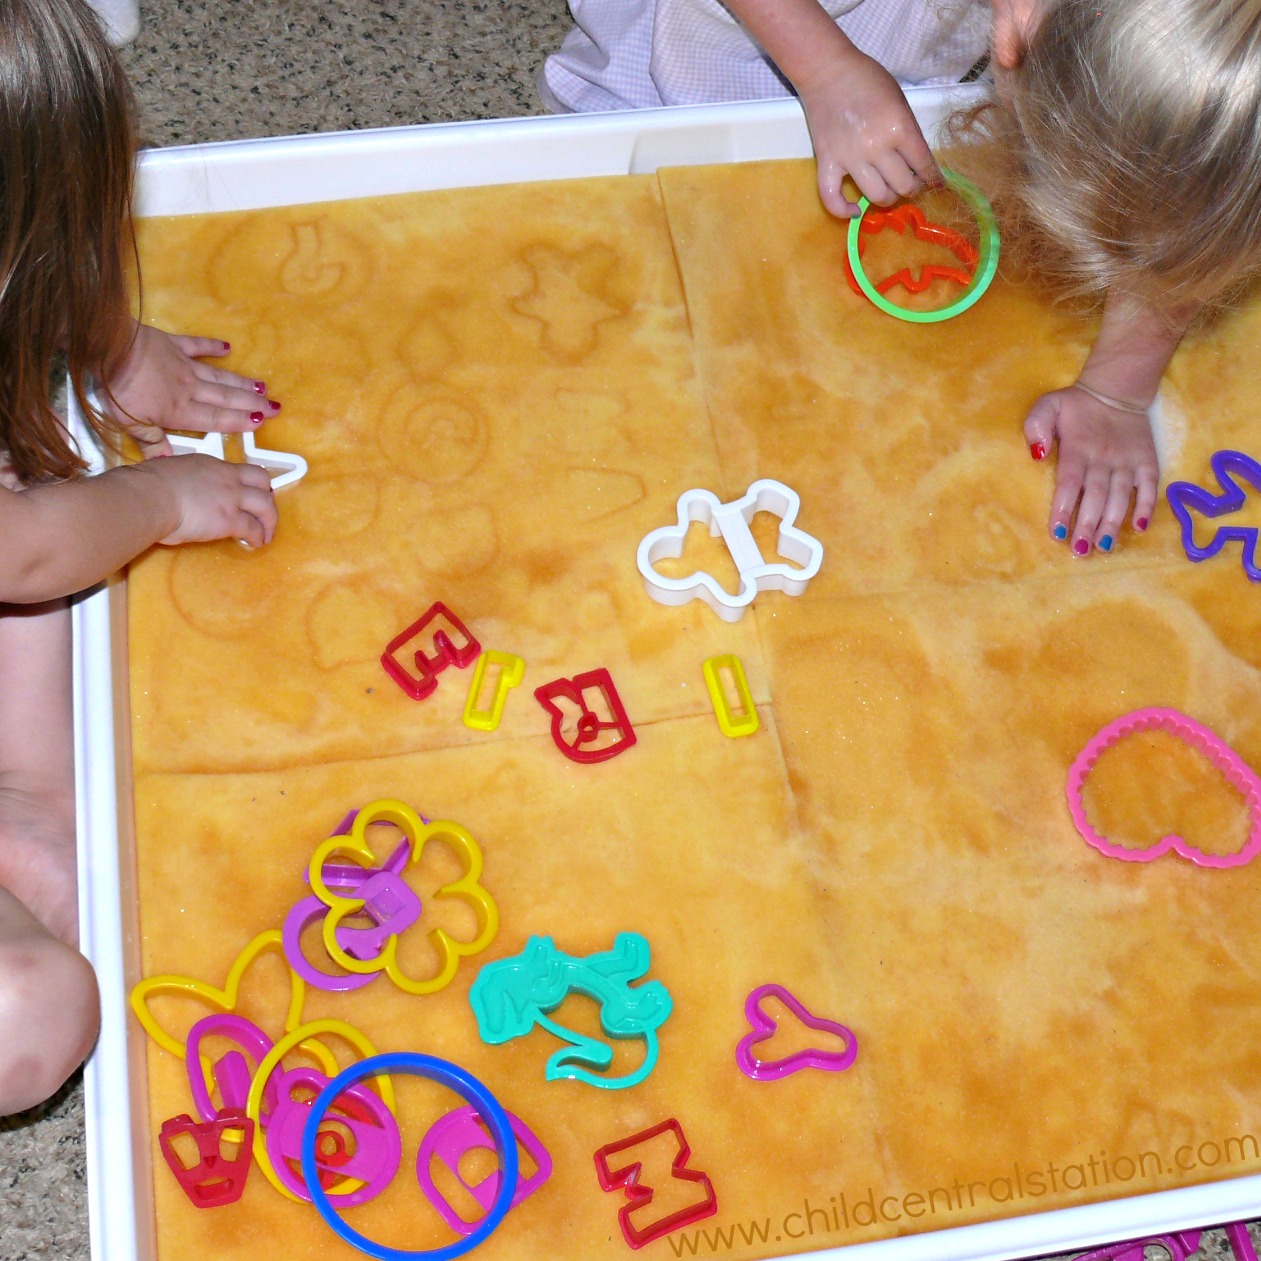
I wonder what else you could press down in the foam to make prints with?

The children tried a multitude of toys, blocks, etc.
Each and every item left a mark or print in the foam!
The favorite item found that kept
the children investigating for hours were.....
plastic cookie cutters!

As you can see from the photos, the cutters left a dark imprint in the foam.
It "magically" disappears when you rub across it.
Our foam is not a special kind, just plain old ordinary craft sponge/foam.
When it is wet, it does act kind of like memory foam!
HOW COOL IS THAT?

The children spent quite some time investigating the various shapes and prints.
Some of the children have been very interested
in learning how to spell their own names.
So, I added a pile of letter cookie cutters
and they make prints of their names too!
Have you ever tried to make prints in wet foam/sponge?
Do you have a great way to help beat the summer heat?
We'd love to hear about it!
Comments
Just wanted to say Thank you for your wonderful resources! I shared your blog page today on my Face book page- come and say hello! Smarty Pants Day Care at Port Vila Vanuatu.
Kind Regards
Jaclyn
PS I posted some photos of my class enjoying some of your sensory table/Science ideas and will surely be posting more in the coming weeks. Thanks again for sharing.
Just wanted to say Thank you for your amazing handouts. I have shared your blog on my Facebook page with some photos of my 3 year old class enjoying your science/sensory ideas. Come say hello at Smarty Pants Day Care Port Vila Vanuatu
Kind Regards
Jaclyn