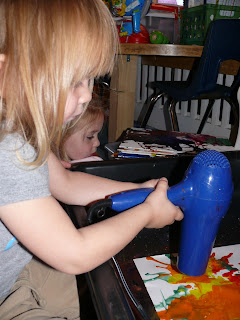
The children have really been enjoying working with the blow dryers as paint brushes. In fact, it has become an almost daily brush of choice. We have spent many hours working on our ever evolving melted crayon art.
Who said that the blow dryer art needed to be limited to crayons and wax? What happens if you try it with tempera paint?
The children decided that they wanted to try some "fall" colors, So we filled our pallet (an old microwave dish) with a variety of fall colors to scoop with spoons onto our paper.
Then after a few scoops of paint, we turned on the blow dryer and watched the paint run to the sides of the paper. We tried hot air, we tried cold air, we tried high speed, we tried low speed.....
We tried little dots, and we tried big blobs!!!!
To help contain the flying paint.... We did this project inside our large cement mixing tub (about $11 from Home Depot) that we usually put inside our pvc pipe sensory table. We found that working on this on the floor was much easier for all of our friends. (How did I manage NOT to put a tutorial for our pvc sensory table on here????? Added to our to do list....)
Check out how the fall colors blend and run together under the force of the air from the blow dryer! It was fun to compare the paint and the crayon. With the paint, once it is dry, it stays put. The crayon keeps melting and moving each time you add more. Thus, the experience is very different, as is the product.
You definitely need something to catch all of the run away paint! (We thinned our paint with liquid starch. It probably wouldn't run as much if it was full strength...)
AND, I don't have many photos for you right now... (watch our Facebook page for updates) But, you can mix the medias.... Use some paint and some crayons for a completely different effect. The paint tends to crackle a bit, how COOL is that!
You can also get more "layers" with the paint and the wax, because the paint stays put after it is dry.
We have also found that grating the crayon onto warm wax adds another effect, as does drawing on the canvas and then heating the drawing.... (Thanks CA for helping to build upon our experimentation!)
Have you tried any blow dryer art yet?
This post was linked up at:

.jpg)


Comments
Aleacia