
Clean Mud via the Microwave!

Have you ever put Ivory soap in the microwave? I first learned about this experiment from over at Housing a Forest.  (We have been microwaving small pieces of soap quite frequently since then. Not full bars, I cut them into about 6 pieces). We have been saving all of the soap sculptures and crushing them into "soap flakes" for later use.
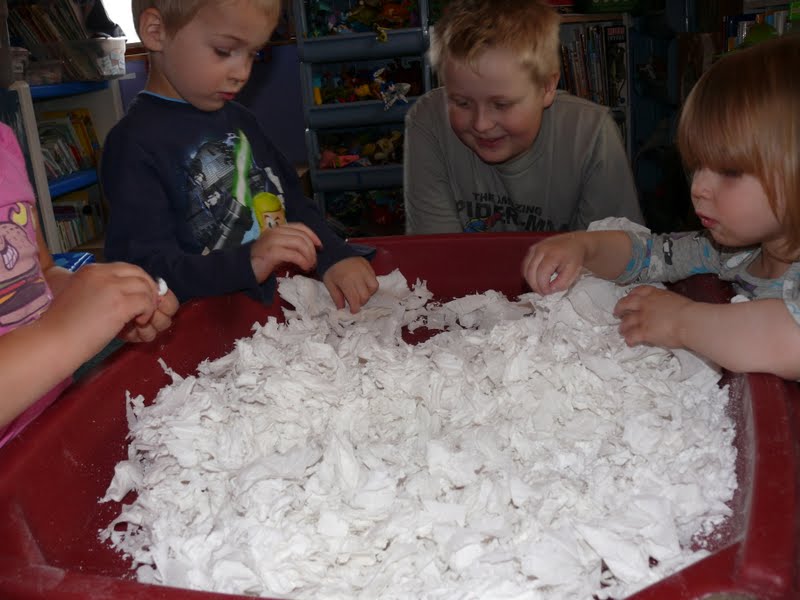
We added the flakes and today's sculptures to our sensory table with a double roll of toilet paper.  The children had a great time shredding and cutting the toilet paper while crushing the microwaved soap.

Then, when we were satisfied with the cutting and shredding, we added some warm water.

This wonderful mixture is known in the field of early childhood education as "clean mud."
 Our batch ended up with a little more water than necessary, but it sure is fun to play with!  This is the first time we have made clean mud in the microwave. In the past, we have used a cheese grater to grate the soap. (When I first started in early childhood, we make ours with soap flakes, but those are nearly impossible to find around here now!)

I shared this post over at The Amazing Mess:


Photobucket
UPDATE!!! We have not been able to find soap flakes ANYWHERE around here, but it does appear that we might be able to start buying them by the case from downstate distributor!!!!! I really miss all of the fun things we have done with soap flakes. Oh, and I am doing a "soap swap" with an Australian blogging friend. I hope to have a box of Lux Soap Flakes any day... and she will have a box filled with Ivory!

Comments

Theresa said…
That looks like GREAT fun! I can't wait to try it for my kids this summer when it's too hot to go outside! Thanks!
Julie said…
This looks like so much fun! And I love the way it kept evolving. I was aware of each of these activities, but had never thought about doing them together. This sounds like it'd be perfect for my little one and his very short attention span!
Play for Life said…
I SOOOOOO want to do this!
Donna :) :)
Scott said…
I've never done this. But it looks like so much fun - and messy. I like messy.
Stacie said…
Wow! I never even considered microwaving soap!! That's awesome -- I got several bars for free with some coupons, so I'll have to give this a try! This just might be perfect for Fun on a Dime!!

Popular posts from this blog

A Few Ideas With Marker Caps (As Promised)

Yesterday, I hope I convinced you not to throw away your markers that "don't work." Today, I will share with you a few ideas for what to do with all of the caps. The possibilities are nearly endless, but here are a few of our recent creations: 1) A Leprechaun/Fairy Ladder/Rope Ladder: 2) #1 if not permanently secured can also double as a rope bridge: 3) #1/#2 can also be made into a train track for your homemade trains :). (No photo available) 4) You can use them as beads for a necklace: 5) You could make them into a wind chime. (No photo available). 6. You can use them as small manipulatives to count, sort, and make patterns with. (No photo available). 7) You could use them as playing pieces in your own homemade board game. (No photo available). 8) You could put them on a wire and glue them in place to make a twirling whirly-gig. 9) You could top them with a lid from a milk jug to make tiny tables or toadstools. 10) You could make them...

Easter Egg Caterpillars!

OOOPS! This post has moved, please click on the photo to be redirected!

"The Markers Don't Work!"

How may times have you heard, "Ms. (fill your name in here), this marker doesn't work!" I know I hear it all the time. Sometimes it is because our little friends forget to replace the caps, and sometimes the markers have just been "all used up!" What do you do with all those markers that just don't work? Please don't tell me that you throw them out, try this instead: First, sort your markers out. Put the caps in one container ( save those too, I'll show you what you can do with them in tomorrow's post) and the markers in another. I have a box for the markers that "don't work" for the children to place them into every time they run across one. You can also have the children help you test the markers periodically to sort out the ones that need to be removed from the "working set." When it comes time to use "the markers that don't work," we use a small sponge paint roller to roll water onto our card...