

One of my favorite activities to do in the warmer months is recycling paper. We save all of the unclaimed art and scraps of paper from other projects in a big tote. When we have a large amount, we fill the sensory table with scraps of paper and scissors. This first stage of the process often takes a day or so. The children are given the opportunity to come and go, cutting and ripping whenever they choose. (Some people use a paper shredder if their goal is make homemade paper. We try to do our without the aid of electrical tools.) In order to make great paper, it is necessary to cut the paper into tiny pieces. The smaller the better. This give the children ample opportunity to work with scissors and to tear paper which is very important to building their fine motor skills.

We cut and we tore, and we cut and we tore... (You will notice that the majority of the paper is white. We usually reuse our colored scraps for other projects adding only a small amount into our recycling project. This is mainly for reasons of color. We always put a little bit of colored paper in, but it takes longer to break down and the red paper runs and turns our paper slightly pink.)
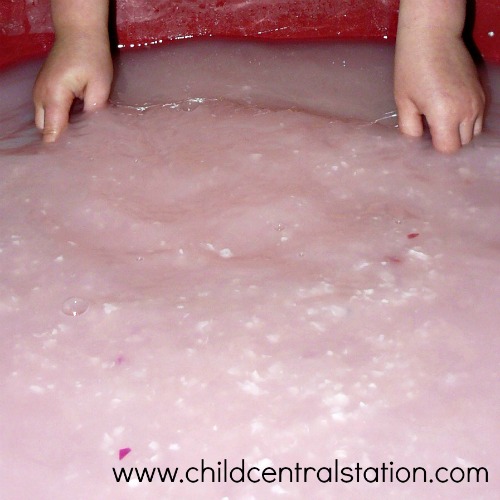
Then, when the paper is in tiny pieces, we add water. We pour just enough to cover up the paper scraps.


The water is clear when we add it to the paper, but in order to recycle the paper, we need to work with the scraps and make the water cloudy. The paper will start to break up into "pulp" which is necessary to make good paper. We "mush" and "squish" the paper between our fingers. We make it into balls and we tear it apart. The more we play with the paper in the water the more it breaks down. (Some people put this mixture in an old blender to help the process. We don't, we use our hands, and we play with the mix almost all day.) We usually let it sit for awhile and we come back to it again.


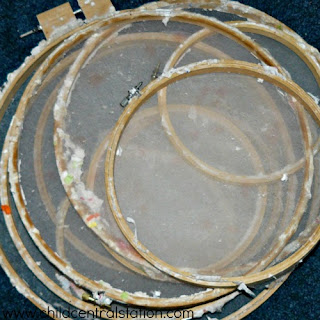
The paper mix starts to look like oatmeal, and we add some more water to get it ready to place on the forms. There are a lot of different forms you can use to put the paper pulp onto to dry. Some people use old window screens. We use embroidery hoops and tulle. Mainly because they are inexpensive and easy to adjust. (These forms have been used a number of times. You can see some of the residual paper sticking to them).

Before we use the forms, we always take out some of the larger pieces of paper. We learned this by trial and error. If you have too many big chunks of paper, the recycled paper will be more like cardboard and it will be difficult to get a consistent layer of paper pulp in the form. We use some of our sand and water toys to do this, but you could use one of the forms or a colander. We scoop the water and paper mixture and drain the water.

Then we take the pulp and form it into a ball, removing as much water as possible. (We set this aside and add it back to the mixture in small amounts as we use it from the pulp water. When we have leftovers, we add glue to it to make a great sculpting clay or paper mache.)


Then we take the pulp and form it into a ball, removing as much water as possible. (We set this aside and add it back to the mixture in small amounts as we use it from the pulp water. When we have leftovers, we add glue to it to make a great sculpting clay or paper mache.)

Finally, we are ready to put the pulp into the forms to make our new paper. This process is kind of like panning for gold. We place the form low down in the table and repeatedly move it back and forth.

This process is fun and can be messy too! The movement creates waves and mixes the water, paper scraps and pulp. Children can often make HUGE waves and splash over the edge. This is part of the fun and the process, but we try to keep the water/pulp level low enough that we don't lose all of our hard work in the waves.


When the child is satisfied with the movement and the pulp they are seeing, they pull the form up. If they can see through it, we encourage them to try it again. If there is not enough pulp in the form, the paper will be thin and difficult to remove from the frame.
We place all of the wet pulp in the frames on our front porch to dry. You can dry them inside, but for us it is quicker to dry them outside. (The forms drip quite a bit as they dry.)

After they have had an adequate time to dry, you can remove them from the form. The best way to tell if they are ready is to rub on the tulle on the opposite side of the pulp. If you rub gently and the paper begins to separate from the tulle the paper is ready. If it does not, you need to let it dry longer.

If the paper is too thin, it will not remove as one piece, it will easily tear. (You can see in this photo, some of our paper was too thin.). When this happens, we usually add the paper back into our scrap box or add it to the balls of pulp we use for sculpting.

Some fun things we have done with our paper include making cool shape collages using scrapbooking punches, making great cards for our parents, or just coloring it with different mediums. The paper has a great texture and is fun to experiment with.
You can add other items to the paper for some fun twists! First, you can add flower seeds when you are getting ready to place the pulp in the molds. Then the paper can be planted. You could add Kool-Aid to make scented/colored paper. You can add red/purple cabbage juice to make your own "color changing paper" for experimenting with acids and bases. Some people add small pieces of yarn or dryer lint. If you are going to add either of these, make sure that the yarn pieces are small and that you don't have animals in your home. (If your dryer lint contains animal hair it does not work out very well!)
This was linked up to:

Comments
I also have it lined up to be tweeted and shared in facebook this week!!
Seriously, LOVE this!!
Beth