
If you have been following our blog, you know that we are in the middle of our yearly stepping stones project. Each year, each child that is enrolled in our care has the opportunity to create a decorative stepping stone for display in our outdoor rock garden. We have become known for our display and the children look forward to creating their own stepping stone each year. Many people make stepping stones by purchasing kits from craft stores. We have found that option to be okay if you only plan on making a single stone, but if you would like to make more stones, there is a much more economical way to do so!
We make our stones with Portland Cement that is mixed with play sand. You can find Portland Cement at nearly all do-it-yourself type stores. This makes very smooth stones. You can use a variety of sand, we always use the sand that has previoiusly been part of our indoor sensory tables. (After we have used the sand indoors we either use it in stones or move it outside. Most of the time, this play sand is the colored variety).
I like to mix the crete by hand. I usually double glove my hands for mixing. You can also use a small shovel or wooden spoon. I like the feel of the mixture oozing through my fingers and I feel better about having a good mixture if I can "feel" it. The mixture we use is:

It takes a few minutes to get a good mixture going. If the crete seems too dry add a little bit more water, if it seems too runny add a little bit more sand and portland cement. The consistency you are looking for is almost like cookie dough.
We make our stones with Portland Cement that is mixed with play sand. You can find Portland Cement at nearly all do-it-yourself type stores. This makes very smooth stones. You can use a variety of sand, we always use the sand that has previoiusly been part of our indoor sensory tables. (After we have used the sand indoors we either use it in stones or move it outside. Most of the time, this play sand is the colored variety).
I like to mix the crete by hand. I usually double glove my hands for mixing. You can also use a small shovel or wooden spoon. I like the feel of the mixture oozing through my fingers and I feel better about having a good mixture if I can "feel" it. The mixture we use is:
 2 Scoops of Sand (Our sand is purple, yours does not need to be).
 2 scoops of Portland Cement. (This is put in the old ice cream bucket right on top of the sand). We add one scoop of water and then begin to mix:

It takes a few minutes to get a good mixture going. If the crete seems too dry add a little bit more water, if it seems too runny add a little bit more sand and portland cement. The consistency you are looking for is almost like cookie dough.
We don't use any special forms for our stones. In fact, the octagon shaped forms we have came from a local grocery store. They typically sold cut fruit and salads in the plastic forms. We have reused these forms for 4 years now, and they still work fantastic. You can use plastic containers and many metal ones. (I don't have a lot of experience with metal forms, but I have been told that you might want to use cooking spray with those forms to make it easier to remove). We opt to reinforce our stones with a light weight rebar that we have left over from creating a rabbit cage. (We have also tried recycling metal window screen, but have found that the rebar works much better). We cut a small piece and place it in each form prior to scooping in the crete.

When the crete has been thoroughly mixed, we add some to each form, tapping the form gently on the table to flatten the crete and remove air bubbles.

We add additional scoops of crete, repeatedly tapping the form until we are satisfied with the thickness of the crete.
 I always place paper towels over the top of the wet stone. This helps keep it from curing (drying) too quickly, and then after we let it set for a few minutes..... It is time to decorate:
(You can visit our previous post where you can see some of the materials we use to decorate by clicking here)

Some of the children plan out their designs very carefully before they place the decorations in the crete while others prefer to just add items and see what they come up with.

After all of the items have been added. I take a wooden toothpick and write the child's name in the crete. Each child helps me determine where they would like their name. Then, I place a paper towel over the stone and we set them aside to dry. When the weather is really hot, we spray them down with water rather regularly to slow the curing process. (If you do not do this, you could end up with cracked stones).


 We keep our stones on display throughout the summer and early fall, and then the stones are sent home with the children. Our winters are far too cold and snowy to keep our stones out year round! Everyone looks forward to making the stones each year and the parent's love having the yearly keepsake!

Some of the children plan out their designs very carefully before they place the decorations in the crete while others prefer to just add items and see what they come up with.

After all of the items have been added. I take a wooden toothpick and write the child's name in the crete. Each child helps me determine where they would like their name. Then, I place a paper towel over the stone and we set them aside to dry. When the weather is really hot, we spray them down with water rather regularly to slow the curing process. (If you do not do this, you could end up with cracked stones).
When approximately 24 hours have passed, we remove the stones from the forms. This is typically a very quick and easy process. We just turn the form upside down and tap gently. Then we spray the stones down with water again and wait at least another 24 hours before putting the stones outside.
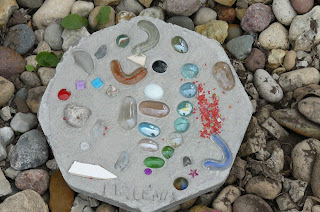
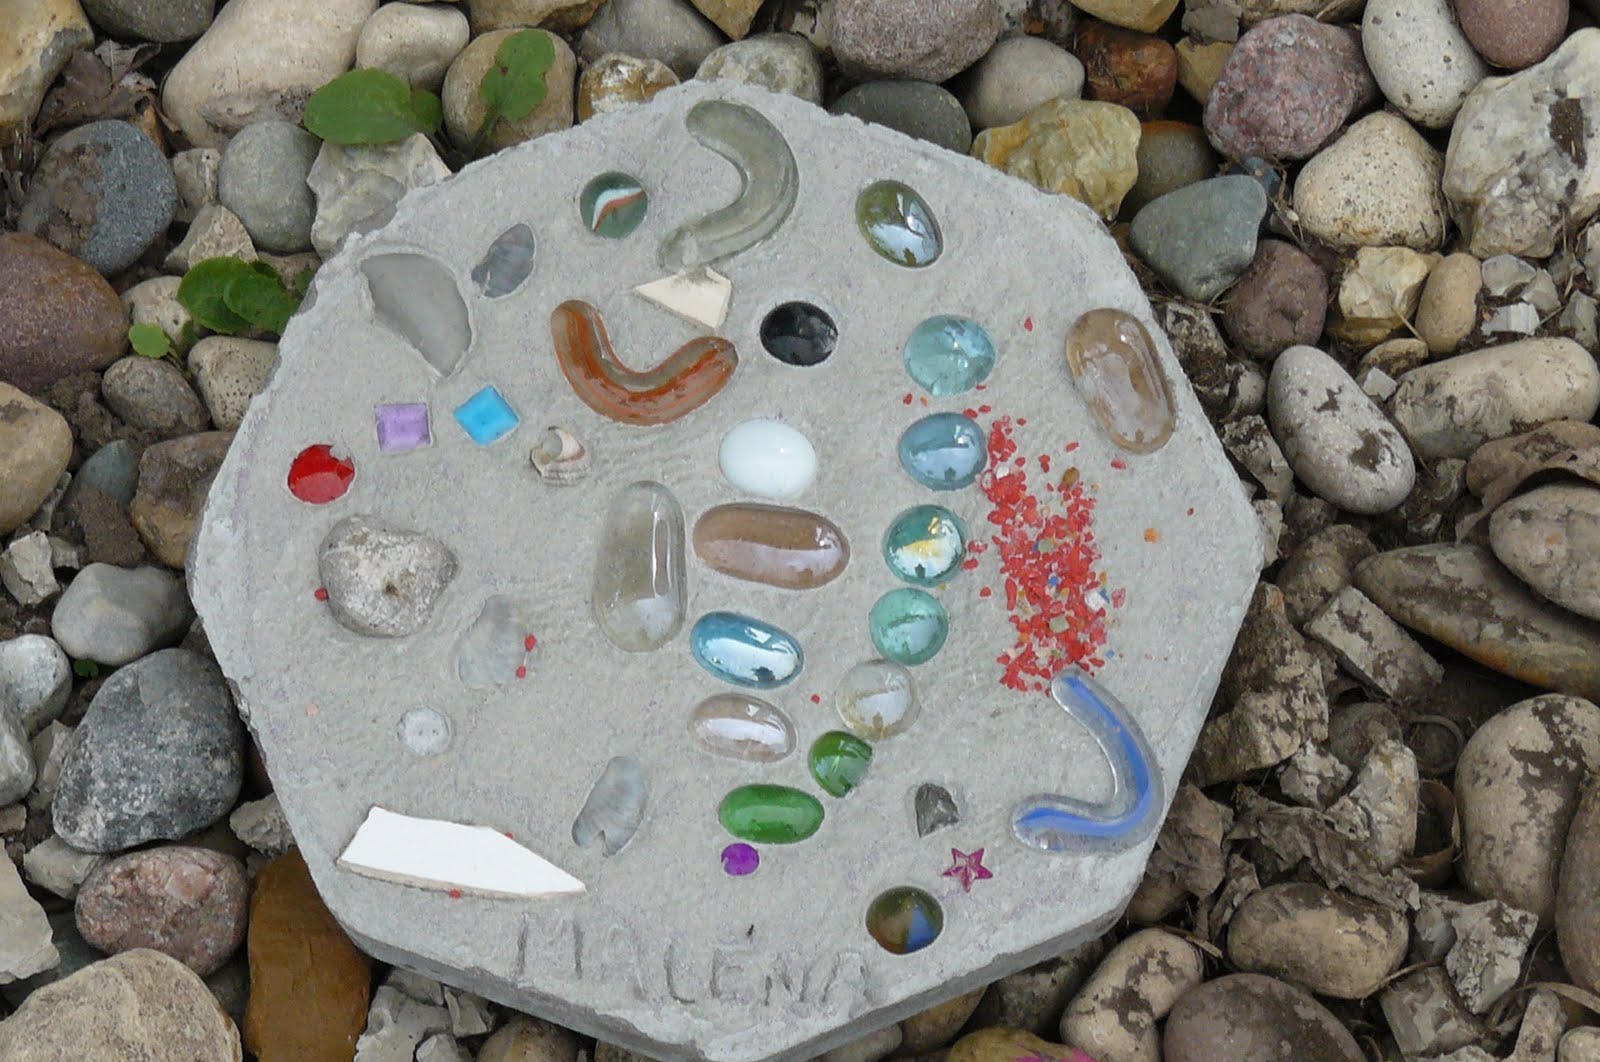
Here are a few more of the stones created this year:

 We keep our stones on display throughout the summer and early fall, and then the stones are sent home with the children. Our winters are far too cold and snowy to keep our stones out year round! Everyone looks forward to making the stones each year and the parent's love having the yearly keepsake!
I haven't priced the stepping stone kits lately, but our method makes stones for less than $1.00 each!
Comments