
A Tinkering Place

I've been thinking a lot about a "permanent" tinkering place to add to our indoor environment. It is difficult to find the balance of space sometimes, as at the end of the day, this is our home. We devote the entire first floor of the house to the childcare, where most people would have a living room, we have a giant classroom! Filled from floor to ceiling with equipment (toys, books, etc... ) for the children.
(This photo was taken awhile back, but it gives you a general idea of the first room you enter in our home daycare)

(Looking at these photos reminds me that I really need to take some newer photos of the classroom!)

This week, Mr. Allan and I started to install our tinkering station. We decided that it would be best placed in the kitchen near all of the arts and crafts supplies. We started with a peg board and shelf.


 Then, I started to stock it with hand tools and moved the shelf of recyclables (the shelf that has the alternating colored baskets in it) over under the peg board. It is filled with metal lids, plastic caps, odds and ends of plastic, mesh nets from produce, peg clothes pins, Popsicle sticks, etc.  We also added a cart of bins for odds and ends pieces of wood, corks, string, fabrics, etc.


As with all of the other areas, I know that this one will evolve over time. I am really excited to have a space devoted to storing our real tools that is now in the area that the children use. (Previously, we stored them in the basement and we retrieved them when needed.) I think that having the tools readily available and plain sight will encourage us to use them more!

I know that taking the majority of our art supplies and organizing them where children could see and access them more readily encouraged more mixed mediums and creative use.  Here is what our art supply area looks like:

We also have a couple of shelves with other arts and crafts supplies and closet filled with more stuff! (And no, I won't be showing any photos any time soon of that closet! It tends to collect a lot of odds and ends.) We have a very child-driven program, and like to have materials ready for use at their level. If a child can reach it and does not come from a box or container that needs to be open, the child can choose to use it without asking for permission.  For this reason, materials that require assistance are stored in covered totes or up higher.
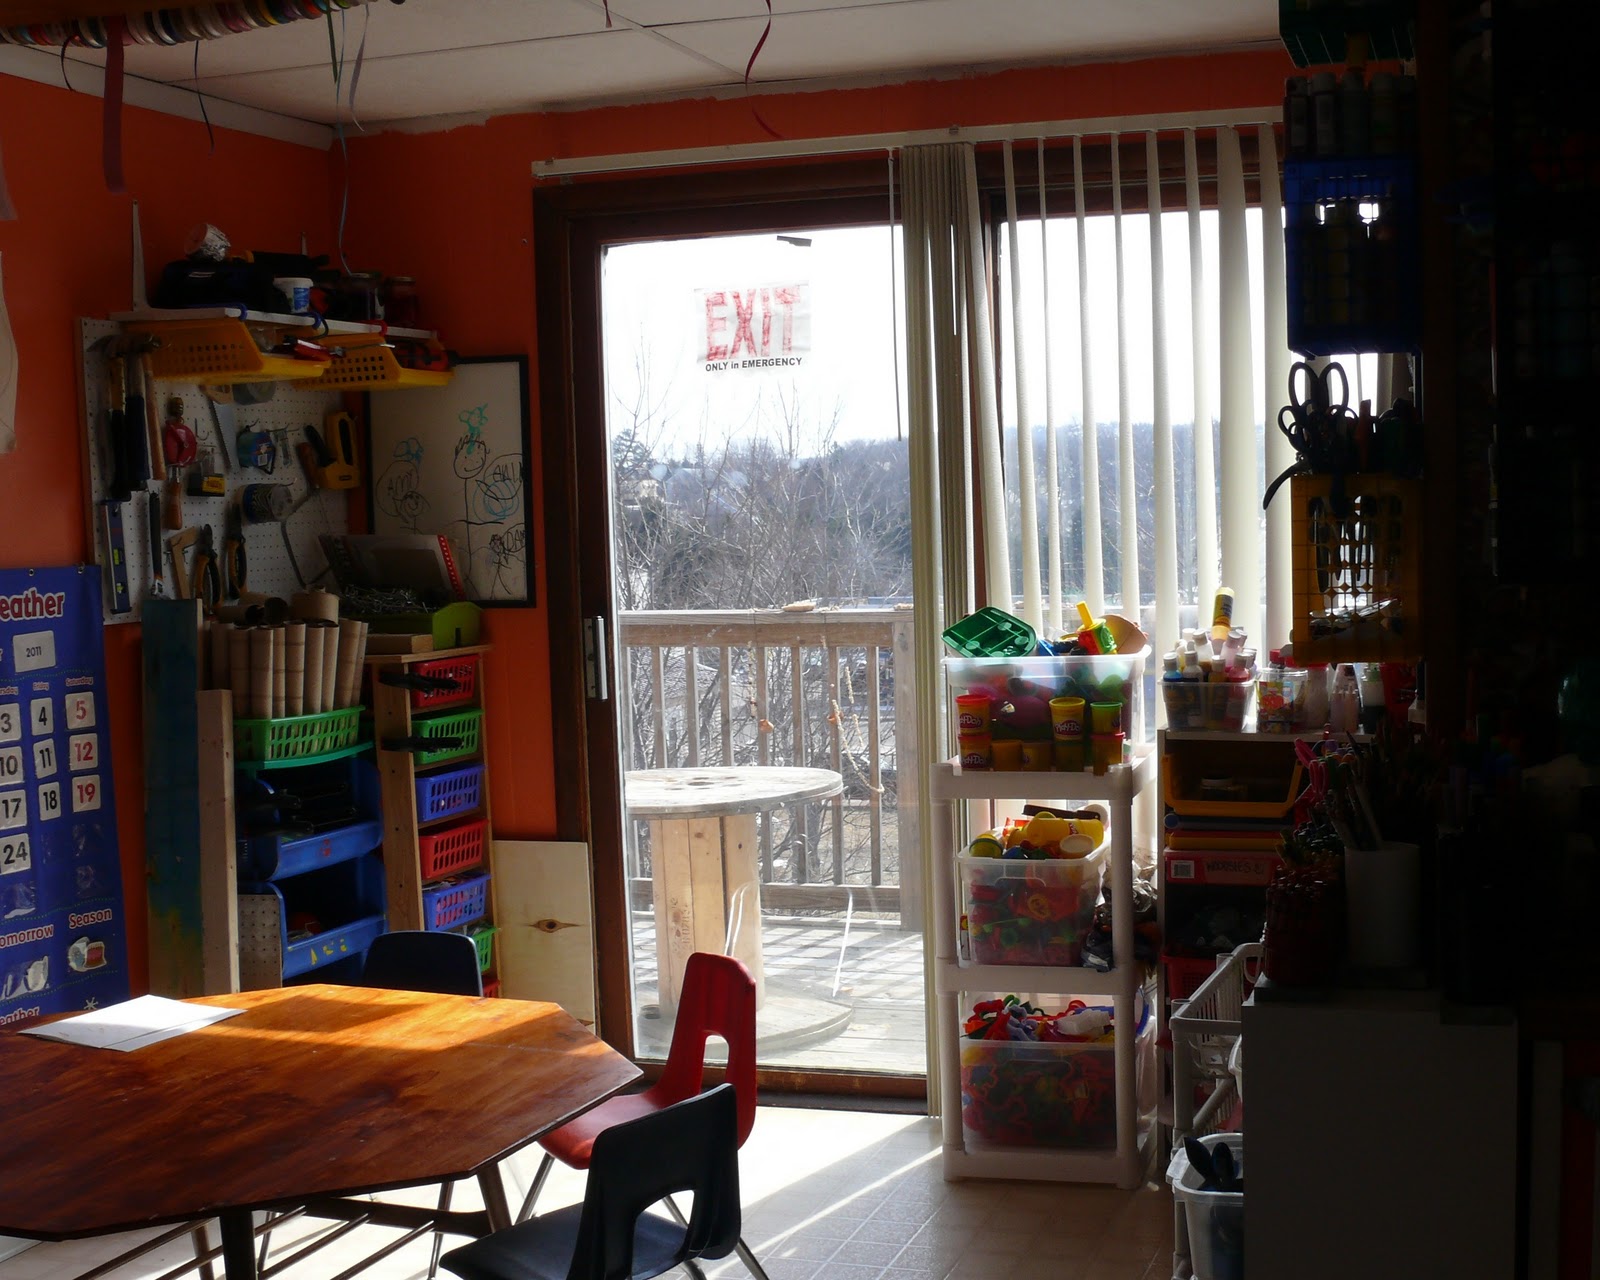

Our kitchen table is child sized, and well loved. We actually found it on a curbside. Someone was getting rid of it because it had a broken leg. We need to make it short for the children, so we cut off all of the legs at a shorter length! Over time, the table top has become a collection of project residue. (Hot glue chunks, paint, etc..... ) Instead of getting a new table, we cut and stained a new table top. So, when we need a nice table for eating or sitting, we put the new top on. When we are working on arts and crafts... and now.. .tinkering.... we will just remove it!

I can't wait to see what the children think about this new addition! Do you have any suggestions for tinkering items? 

Comments

Wow, I can't believe that is your home, it looks like a purpose built classroom - if you know what I mean?!?! I love the idea of your tinkering station.
diane said…
I swear you can re-purpose anything! Makes me think about what I am throwing away!!
Wendy said…
Does your family eat at the child sized table or is that a classroom specific item?

Popular posts from this blog

A Few Ideas With Marker Caps (As Promised)

Yesterday, I hope I convinced you not to throw away your markers that "don't work." Today, I will share with you a few ideas for what to do with all of the caps. The possibilities are nearly endless, but here are a few of our recent creations: 1) A Leprechaun/Fairy Ladder/Rope Ladder: 2) #1 if not permanently secured can also double as a rope bridge: 3) #1/#2 can also be made into a train track for your homemade trains :). (No photo available) 4) You can use them as beads for a necklace: 5) You could make them into a wind chime. (No photo available). 6. You can use them as small manipulatives to count, sort, and make patterns with. (No photo available). 7) You could use them as playing pieces in your own homemade board game. (No photo available). 8) You could put them on a wire and glue them in place to make a twirling whirly-gig. 9) You could top them with a lid from a milk jug to make tiny tables or toadstools. 10) You could make them...

Our DIY Light Tables

There has been a lot of buzz about light tables over at Teach Preschool on Facebook . Deborah has collected some great ideas for light table play and has been experimenting with making her own table over on the Teach Preschool blog.   I thought I would share with you our two light tables and how we made them. This first table is one that we put together with some scrap wood pieces, an old plexi-glass door from an entertainment center, and a couple of aquarium lights. Total Cost = $0. (We had everything on hand.)  The table needs a little bit of tweaking. (It is on my to do list).  Basically, we made a frame of wood around the plexi-glass and placed the lights under it. Our DIY skills in putting this together were far from expert, so the frame has a couple of gaps (and the reused wood is warped). We plan to try a new frame and use some caulk to seal any gaps.  We also plan to attach the lights to the side of the frame instead of just placing them on the f...

"The Markers Don't Work!"

How may times have you heard, "Ms. (fill your name in here), this marker doesn't work!" I know I hear it all the time. Sometimes it is because our little friends forget to replace the caps, and sometimes the markers have just been "all used up!" What do you do with all those markers that just don't work? Please don't tell me that you throw them out, try this instead: First, sort your markers out. Put the caps in one container ( save those too, I'll show you what you can do with them in tomorrow's post) and the markers in another. I have a box for the markers that "don't work" for the children to place them into every time they run across one. You can also have the children help you test the markers periodically to sort out the ones that need to be removed from the "working set." When it comes time to use "the markers that don't work," we use a small sponge paint roller to roll water onto our card...